
비슷한 알루미늄 엔드밀의 성능이 왜 이렇게 다른가?
Aluminum end mill performance can differ even when two Ø6 mm, 3-flute tools share a 35° helix, square end, uncoated finish and listed dimensions. One cuts cleanly; the other leaves buildup, burrs or uneven flute wear.
For a distributor, that difference becomes a purchasing problem: can the alternative replace the customer’s current tool, and will the next order perform like the sample?
Comparing aluminum end mill performance takes more than matching catalogue specifications. Start with the machining conditions, then check the geometry, edge condition and consistency that the specification sheet may leave out.
For the wider selection process, see our 초경 엔드밀 선정 가이드.
간단한 답변
Match the application, compare the complete tool, then verify repeatability.
Check the application
Confirm alloy, operation, reach and cutting data.
Compare the tool
Check edges, flute space, geometry and mounted runout.
Verify repeatability
Test several tools; retain the approved specification for reorders.
목차
Start with the Symptom, Then Separate Setup from Tool Differences
A machining symptom points to possible causes; it does not identify the cause by itself. Use this order to avoid replacing a tool while leaving the same problem in the machine.
On a small screen, swipe the table sideways to read all columns.
| What the customer reports | Check the setup first | Then compare the tools |
|---|---|---|
| Aluminum buildup | Lubrication reaching the cut, chip removal, actual feed and speed | Edge sharpness, flute finish, rake geometry |
| Chip packing or recutting | Coolant or air direction, pocket depth, engagement and toolpath | Flute space, core size and flute transitions |
| Chatter or poor finish | Overhang, holder, workholding, engagement and cutting data | Cutting-edge runout, stiffness and geometry |
| Early edge chipping | Mounted runout, chip load, entry conditions and recutting | Edge defects, edge support and carbide grade |
| Variation between tools | Remounting, material lot, offsets and parameter changes | Tool-to-tool geometry, edge condition and lot records |
For a buildup complaint, use our guide to aluminum sticking to end mills to collect the application details before recommending a replacement.
1. Carbide Substrate: Look Beyond Hardness
Carbide grades differ in wear resistance and toughness. Edge retention matters, but the edge also needs enough support to survive the actual loading conditions.
Compare wear and chipping under the same documented test. If one tool chips early, investigate runout, engagement and edge geometry before attributing the result to the carbide grade alone.
2. Cutting-Edge Condition: Inspect Several Tools
Two similar-looking tools can have different edge radii, grinding marks, burrs or micro-chipping. These differences can affect cutting resistance, adhesion and the point at which surface finish deteriorates.
Request comparable magnified views of the cutting edges, including the end teeth, from several samples. A catalogue photo shows appearance; it cannot establish edge consistency.
3. Core and Flute Geometry: Match the Operation
Matching diameter and flute count still allows different core sizes, flute depths and chip spaces. That changes the balance between stiffness and chip clearance.
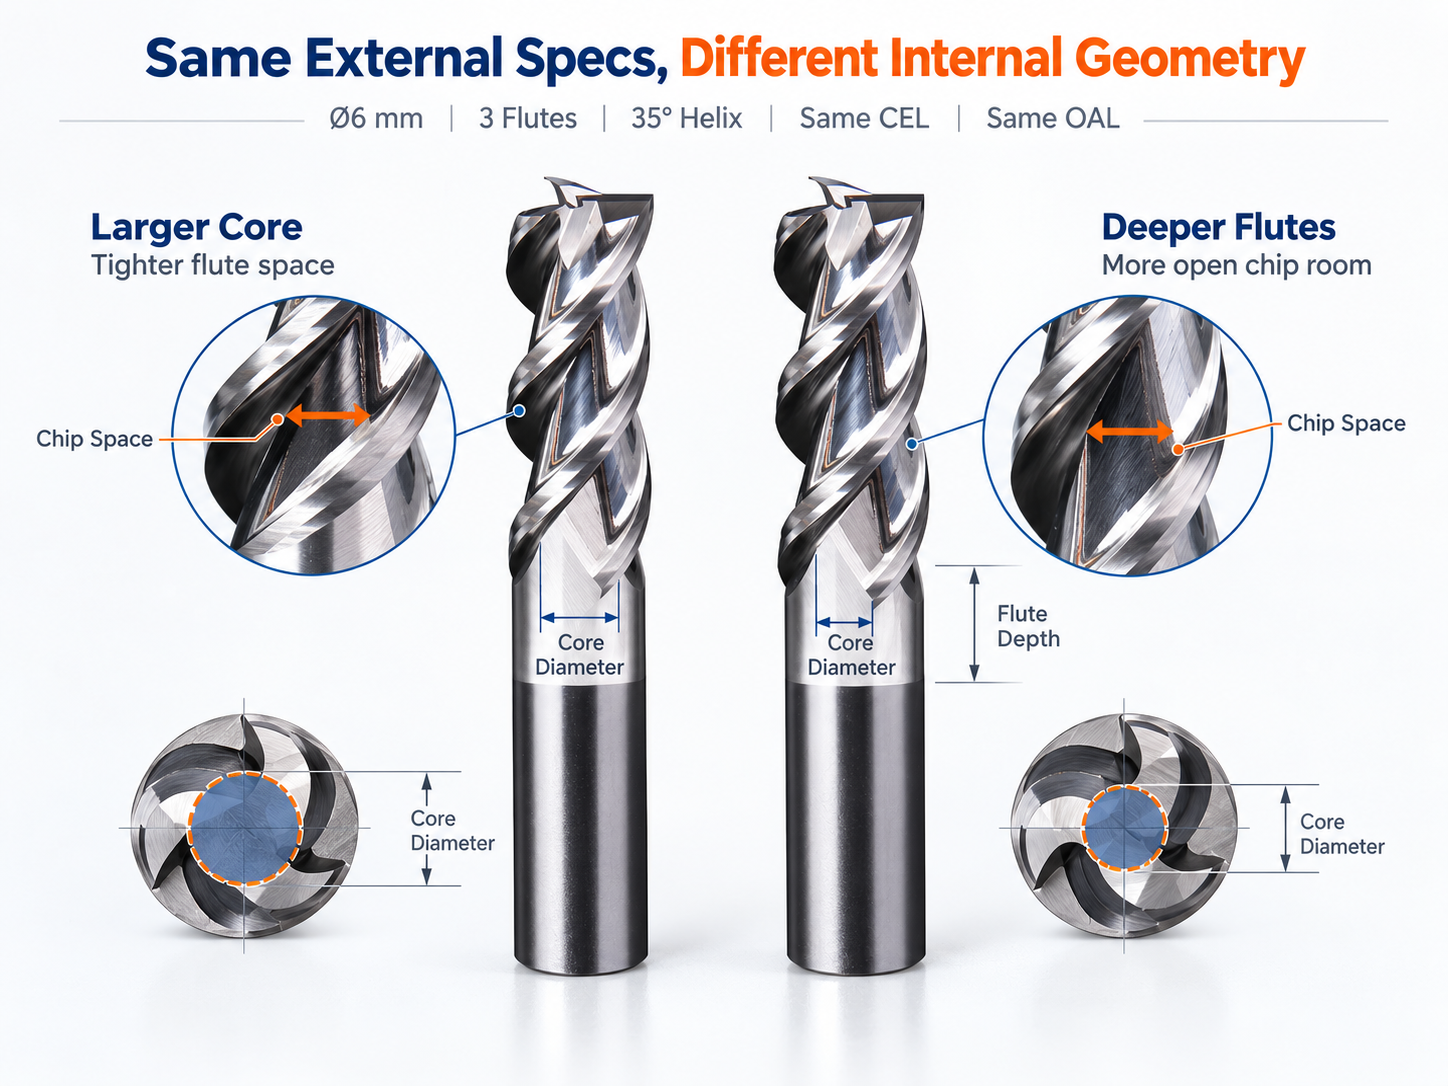
Can improve section stiffness, with less room available for chips when other dimensions are comparable.
Can provide more chip capacity, with a potential trade-off in section stiffness.
Full slots and deep pockets can constrain chip escape more than open side milling. Tell the supplier which operation the customer runs, rather than requesting an aluminum tool by flute count alone.
4. Rake and Relief: Helix Angle Is Not the Whole Geometry
A listed 35° helix does not specify rake or relief. These features influence how freely the edge cuts, how much material supports it and whether the flank rubs against the workpiece.
More positive rake can reduce cutting resistance, but edge support still matters. Insufficient clearance can increase rubbing; excessive relief can weaken the edge. Judge the combination against the operation and observed wear.
5. Flute Finish: Compare Chip Flow, Not Brightness
Polished flutes can help chip flow and reduce sites where aluminum adheres. A bright product photo, however, does not reveal local roughness, grinding marks or uneven flute transitions.
Ask for comparable close-ups, then check buildup and evacuation during the trial. Persistent chip packing also calls for a review of lubrication delivery, engagement and available chip space.
6. Runout: Measure Where the Tool Cuts
When one cutting edge runs farther from the rotational axis, the flutes can share the load unevenly. This can contribute to unequal wear, edge chipping, surface marks and shorter useful life.
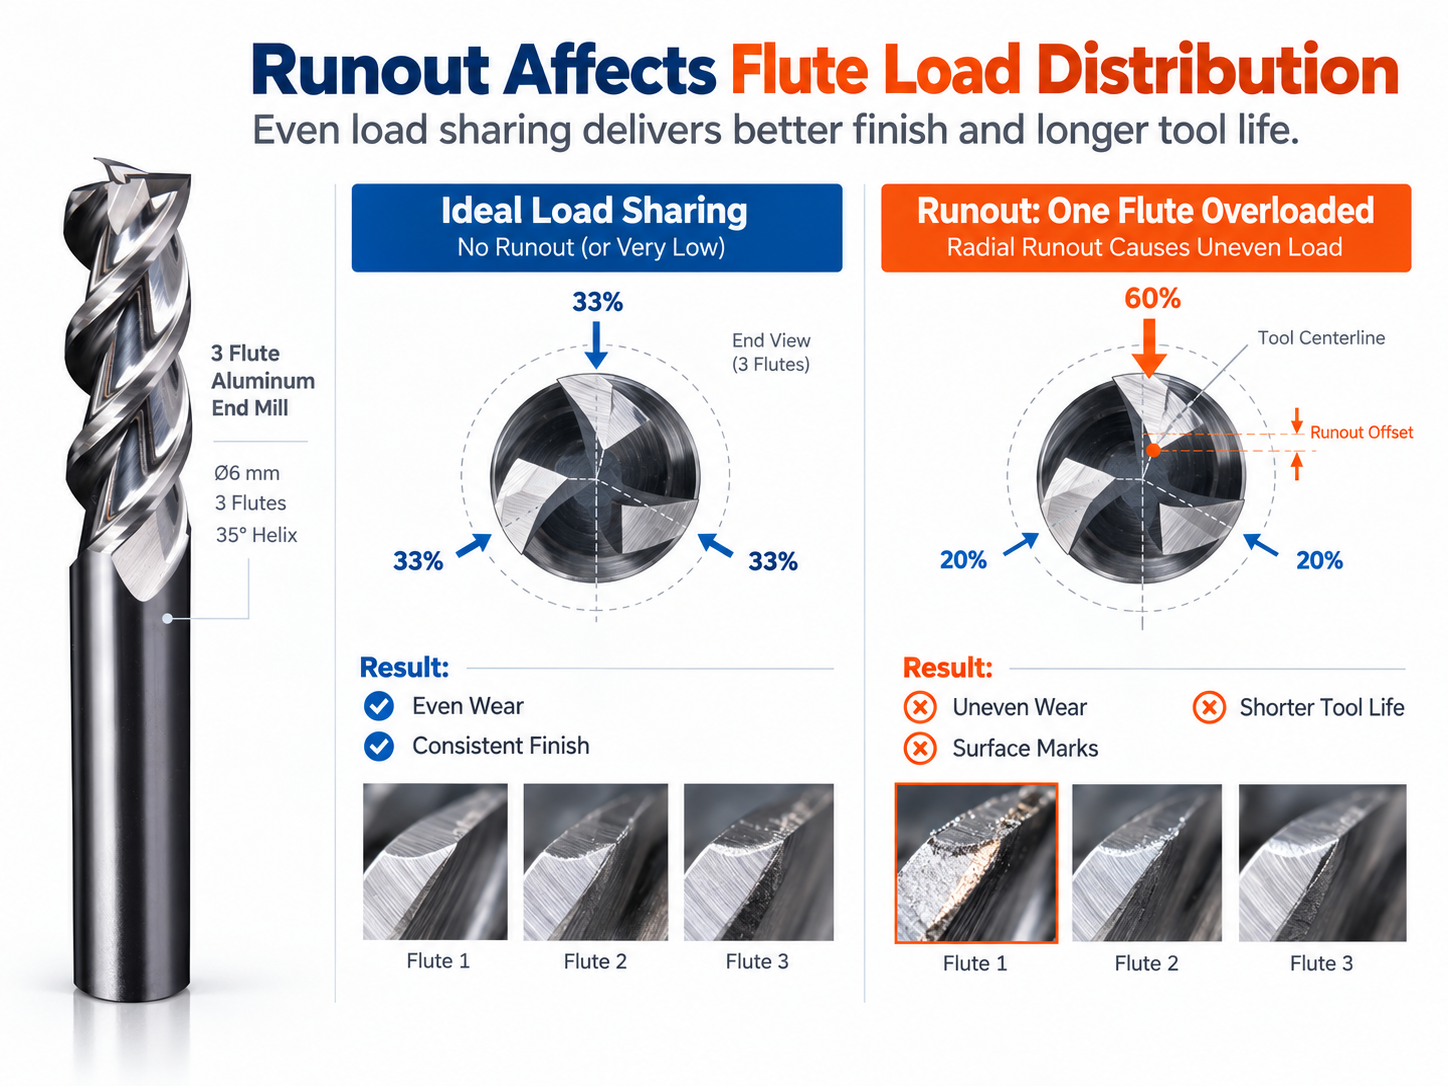
Checks cutting-edge position relative to a defined reference, such as the shank axis. Record the inspection method and measuring location.
Checks the assembled tool, holder and spindle system. Mounting, collet condition and contamination can change the reading.
A shank reading alone may not represent runout at the cutting edges. Use a method suitable for the tool geometry and size; avoid damaging sharp edges with unsuitable contact measurement.
Clean the interfaces, keep overhang comparable, and record mounted runout for each trial tool. For a broader setup review, see our guide to reducing chatter in end milling.
For small features, compare the 2-flute polished micro square end mill for aluminum. Check cutting diameter, usable length and mounted runout; do not scale a larger cutter’s trial settings unchanged.
7. Grinding Consistency: Check the Spread Between Samples
One successful sample shows that one tool worked in that test. Several documented samples provide better evidence of how the model behaves under those conditions.
Compare edge appearance, critical dimensions, runout and machining results by tool ID. A wide spread in accepted parts or finish deserves investigation even when the average result looks acceptable.
8. Batch Consistency: Carry Approval into Repeat Orders
Keep an unused reference sample, the approved specification and the trial record. Record production lot numbers so a later complaint can be traced to an identifiable shipment.
Agree which features are controlled on repeat orders and how changes will be communicated. A small production order adds evidence; it does not establish that every future lot will behave identically.
우리의 제조 및 품질 page explains the production and inspection workflow. Confirm the inspection scope for the specific tool being purchased.
Before placing the next order, use our carbide end mill repeat-order checklist to reconfirm the approved model and any changes.
Aluminum End Mill Options to Compare
Choose the operation first. These are different configurations to evaluate, rather than interchangeable tools.

Polished 3-flute square
General slotting, side milling and pocketing. Compare reach and chip clearance.
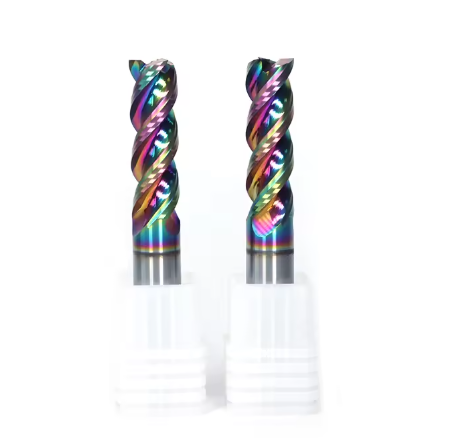
DLC 3-flute square
A coated option to evaluate where adhesion affects the result. Confirm the actual geometry.
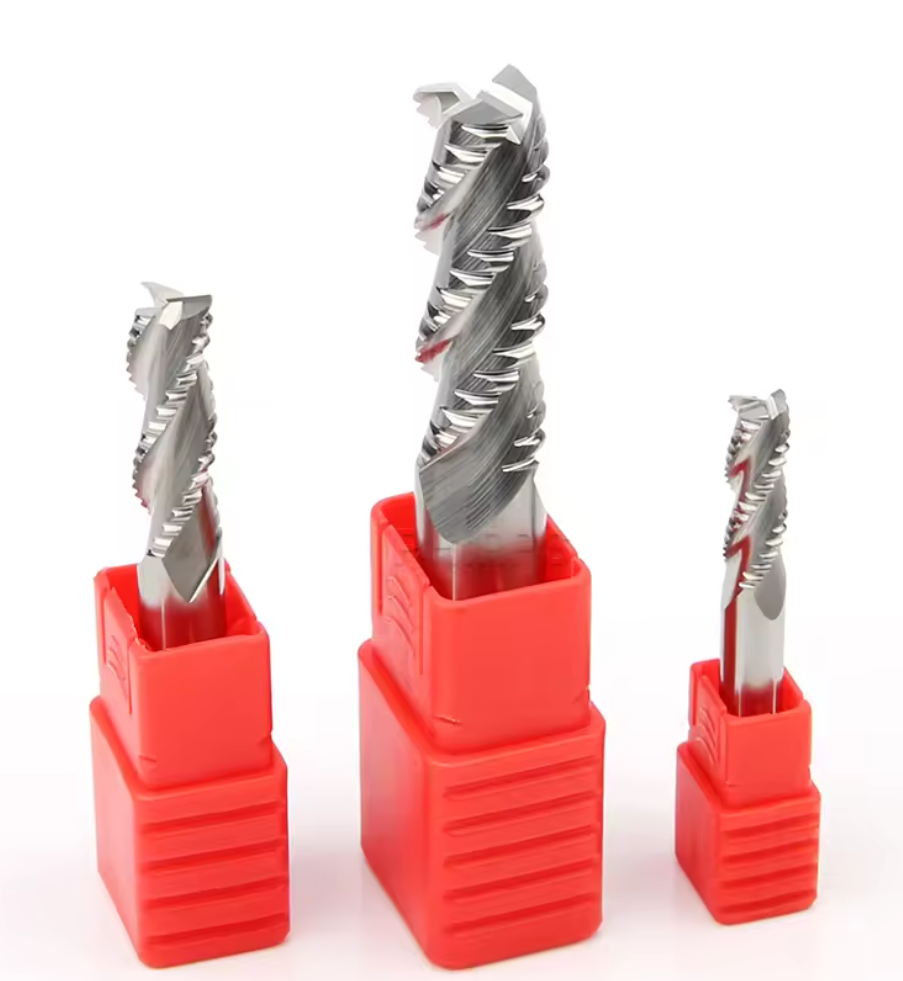
Polished roughing end mill
Serrated edges for stock removal. Leave allowance for a separate finishing pass.
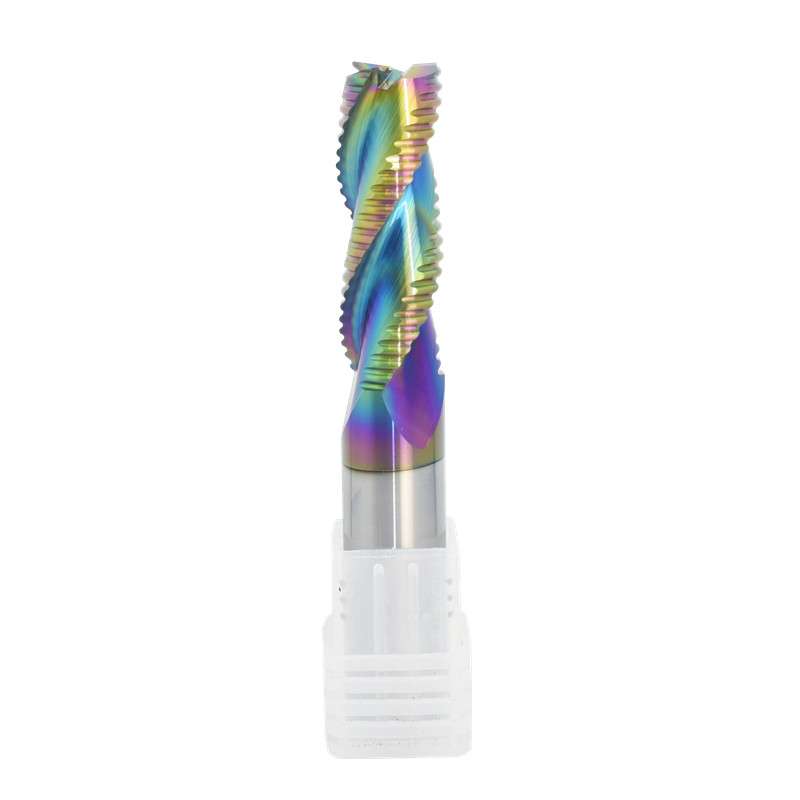
DLC roughing end mill
Coated, serrated geometry for roughing trials. Check stock removal and subsequent finishing.
Comparison note: the uncoated square series lists a 35° helix; the metric DLC series lists 45° standard and 35° optional. Changing series is not automatically a coating-only test.
Need fractional dimensions? See the inch-size DLC aluminum end mills and confirm both cutting and shank dimensions.
How to Test a Replacement Aluminum End Mill
First decide what the customer needs to prove: a direct replacement in the current process, or better results with revised cutting data. These require different comparisons.
Keep the part, material, setup and cutting data comparable. This tests whether the alternative works in the customer’s existing process.
Use suitable data for each tool, but keep part acceptance requirements the same. Record all parameter changes and cycle time alongside tool life.
Use One Record for Every Trial Tool
The distributor does not need to run the machine. Send this checklist to the customer’s operator and request the completed record with photos of the used tool and machined surface.
| Record | Information to enter |
|---|---|
| Tool identity | Supplier, model, individual tool ID, production lot; diameter, cutting length, shank, overall length, flutes and coating |
| Workpiece and operation | Alloy grade and condition; slotting, pocketing, side milling or finishing; part drawing and acceptance requirements |
| Setup | Machine, holder or collet, overhang, workholding; mounted runout with method and measuring location |
| 절단 조건 | RPM, feed rate, axial depth (ap), radial engagement (ae), entry strategy and coolant or air delivery |
| Results | Accepted and rejected parts, cycle time, measured dimensions or finish, buildup, wear and edge condition |
| Stop reason | Agreed wear limit, finish limit, dimensional limit, chipping or breakage; record which occurred first |
Use the same acceptance and stop criteria when comparing useful life. One tool stopped for finish deterioration cannot be fairly compared with another run until breakage.
Move from Samples to a Controlled First Order
Test several individually identified samples, then review a small production order before expanding purchases. Choose the sample quantity and inspection scope according to order size, application risk and the customer’s tolerance requirements.
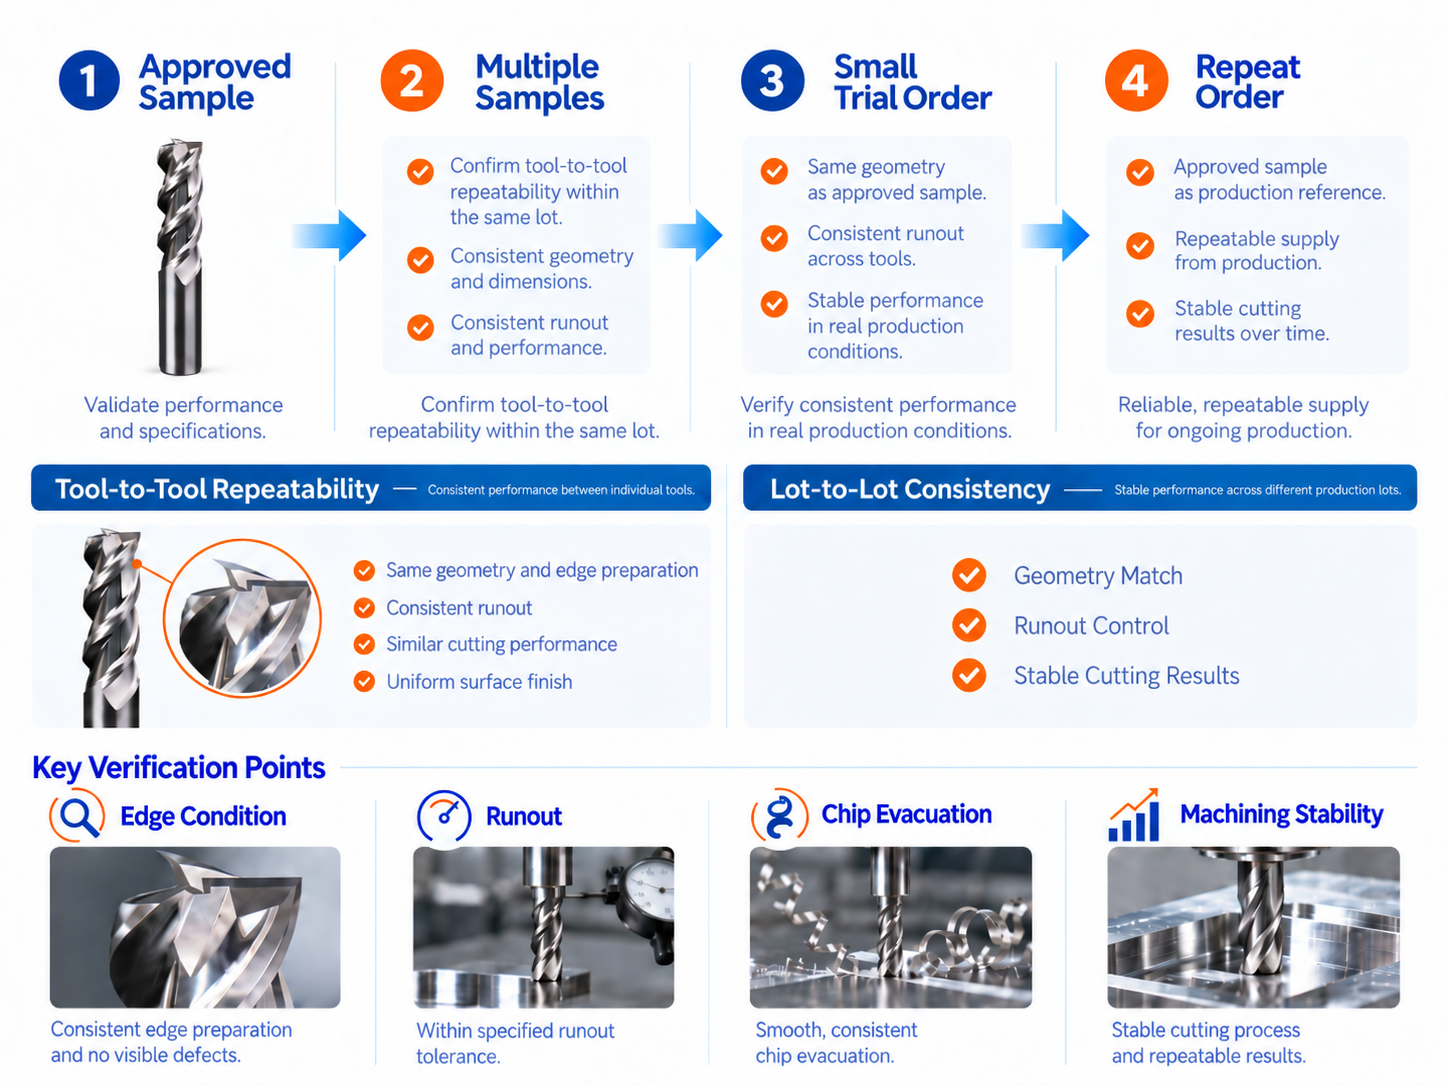
If a trial fails, resolve the failure before increasing the order. In a diagnostic retest, change one major variable at a time so the result remains interpretable.
For the first commercial batch, see the 절삭 공구 체험 주문 안내 for order and test details to agree before shipment.
Compare Tool Cost per Accepted Part
Unit price is easy to compare. Useful life only becomes comparable when both tools meet the same part requirements and are judged against the same stop criteria.
| Tool | Purchase price | Accepted parts per tool | Tool purchase cost per accepted part |
|---|---|---|---|
| A | USD 10 | 500 | USD 0.020 |
| B | USD 8 | 250 | USD 0.032 |
Calculation: tool purchase price ÷ accepted parts produced by that tool.
In this example, A costs more to buy but less per accepted part. These figures are not product test claims, and they exclude machining time, tool changes, scrap and labor.
For the customer’s production decision, add those costs where they materially differ. For the distributor’s purchasing decision, also track replacements, complaint handling and delivery reliability. A higher price needs evidence of value.
Buyer Checklist Before Approving a Supplier
| Approval area | What to confirm in writing |
|---|---|
| Application fit | Alloy, operation, engagement and whether the tool is a direct replacement or needs revised cutting data |
| Tool specification | Model or drawing revision, dimensions, geometry requirements, coating and agreed inspection limits |
| Trial acceptance | Part dimensions, finish, useful-life criteria, sample identities and the completed trial records |
| Repeat-order control | Lot identification, retained reference, inspection scope and notification of agreed specification changes |
| Commercial terms | Trial and production quantities, lead time, packaging, price validity and complaint review process |
For private-label supply, connect the approved specification to your own SKU and packaging records. See our OEM & Private Label cutting tool programs for supply options.
Questions Buyers Ask Before a Trial Order
Can you match the aluminum end mill my customer already buys?
Send the full tool code or a clear label photo, the dimensions, aluminum grade and operation. We can compare a standard or custom option. Matching diameter and flute count alone does not confirm that it will behave the same way.
Should I start with polished or DLC-coated tools?
If the current polished tool works, keep it as your trial reference. If buildup or wear is the problem, check chip removal and cutting conditions first, then evaluate a suitable DLC option. Confirm the geometry as well as the coating.
Can I mix sizes in a small trial order?
Yes. Send the quantity for each diameter and length, including any inch sizes. Most standard tools start from 10 pcs; we’ll confirm the MOQ for the selected items. Samples are generally charged, and freight is paid by the buyer.
Can you make a different cutting length or shank?
Send a drawing, sample or dimensioned reference, together with the alloy, operation and quantity. We’ll review feasibility, price and lead time. For a longer tool, include the required feature depth and holder clearance.
How do I keep the repeat order consistent with the sample?
Quote the previous order and approved tool specification when reordering. We keep confirmed specifications, drawings and order records; custom dimensions and tolerances are reconfirmed before production. Include the trial record so the machining requirements are clear.
What if my customer reports sticking or early wear?
Keep the affected tools and packaging information. Send photos or video, the tool size, affected quantity, alloy, RPM, feed, engagement and coolant conditions. We’ll review the application and tool condition before discussing the appropriate next step.
For payment, samples and shipping, see our 구매자 자주 묻는 질문.
Related Aluminum Milling Guides


Planning a Replacement or Repeat-Supply Trial?
Send the current tool specification, aluminum grade, operation and trial or complaint records. Include the trial quantity, expected order quantity and any packaging requirements.
Use these details to agree the proposed tool, sample scope and acceptance checks before placing a larger order.
Technical reference
Measurement background: Harvey Performance — Reducing Tool Runout. Use the selected tool’s inspection method and application data.