
Cutting Tool Cost per Part: Avoid 7 Costly Mistakes
A lower cutting-tool price can reduce purchasing cost, but it does not automatically reduce machining cost. A higher-priced tool is not automatically the better value either. The fair comparison is the cutting tool cost per part—and, more precisely, the total compared process cost per accepted part.
This guide shows machinists, buyers and tooling distributors how to compare tools using tool life, cycle time, changes, scrap, rework and repeatability—and avoid seven mistakes that distort the result.
Cutting Tool Cost per Part: The Quick Answer
Compare candidates on the same machine, part and acceptance criteria. Purchase price is one input, not the final result.
| Cost factor | What to record | Why it matters |
|---|---|---|
| Tooling | Tool, insert, usable edges, regrinding and recoating | Establishes the direct consumable cost |
| Accepted output | Good parts produced before the defined stop point | Prevents scrap from making tool life look better |
| Cycle time | Stable cutting time per accepted part | Connects tool performance to machine capacity |
| Tool changes | Planned changes, offsets, inspection and restart time | Captures interruptions that purchase price misses |
| Quality loss | Scrap, rework, extra inspection and sorting | Measures the cost of unstable output |
| Repeatability | Results across several edges, tools or batches | Shows whether one successful trial is dependable |
Swipe to view all columns.
What Does Cutting Tool Cost per Part Mean?
Direct tool cost per part is the tooling spend divided by the number of parts produced. For an indexable insert, include usable cutting edges. For a solid carbide end mill or drill, the calculation may also include approved regrinding and recoating cycles.
That calculation is useful but incomplete. A longer-lasting tool may need a slower cycle. A low-priced tool may produce stable parts and become the most economical choice, or require frequent corrections and unpredictable changes. The meaningful denominator is accepted parts, not pieces started.
Seco’s explanation of production economy treats productivity, process cost, predictability and workpiece quality as connected goals. It also notes that tool handling, setup and problem solving consume production time. This is why tooling should be evaluated inside the complete machining process.
A Practical Cost-per-Good-Part Formula
For supplier comparisons, use a formula detailed enough to capture meaningful differences but simple enough for the shop to maintain:
= (tooling spend + productive machine-time cost + tool-change and interruption cost + scrap and rework cost) ÷ accepted parts
Use the same accounting basis for every candidate. If a loaded machine-hour rate includes labor and overhead, do not add them again; if it covers all elapsed time, do not separately count change time. Sandvik Coromant’s manufacturing economics calculator likewise uses a shop’s own values to estimate component cost.
| Tool type | Suggested direct-tool cost basis | Important check |
|---|---|---|
| Solid carbide tool | Tool price ÷ accepted parts per tool | Include approved regrind and recoat cycles if used |
| Indexable insert | Insert price ÷ usable edges ÷ accepted parts per edge | Count only edges that can actually be indexed and used |
| Indexable tool body | Amortized body cost ÷ accepted output over its approved service period | Keep body damage separate from normal insert wear |
| Reground tool | New tool, regrinding, recoating and logistics ÷ total accepted output | Confirm diameter change and performance after each cycle |
Swipe to view all columns.
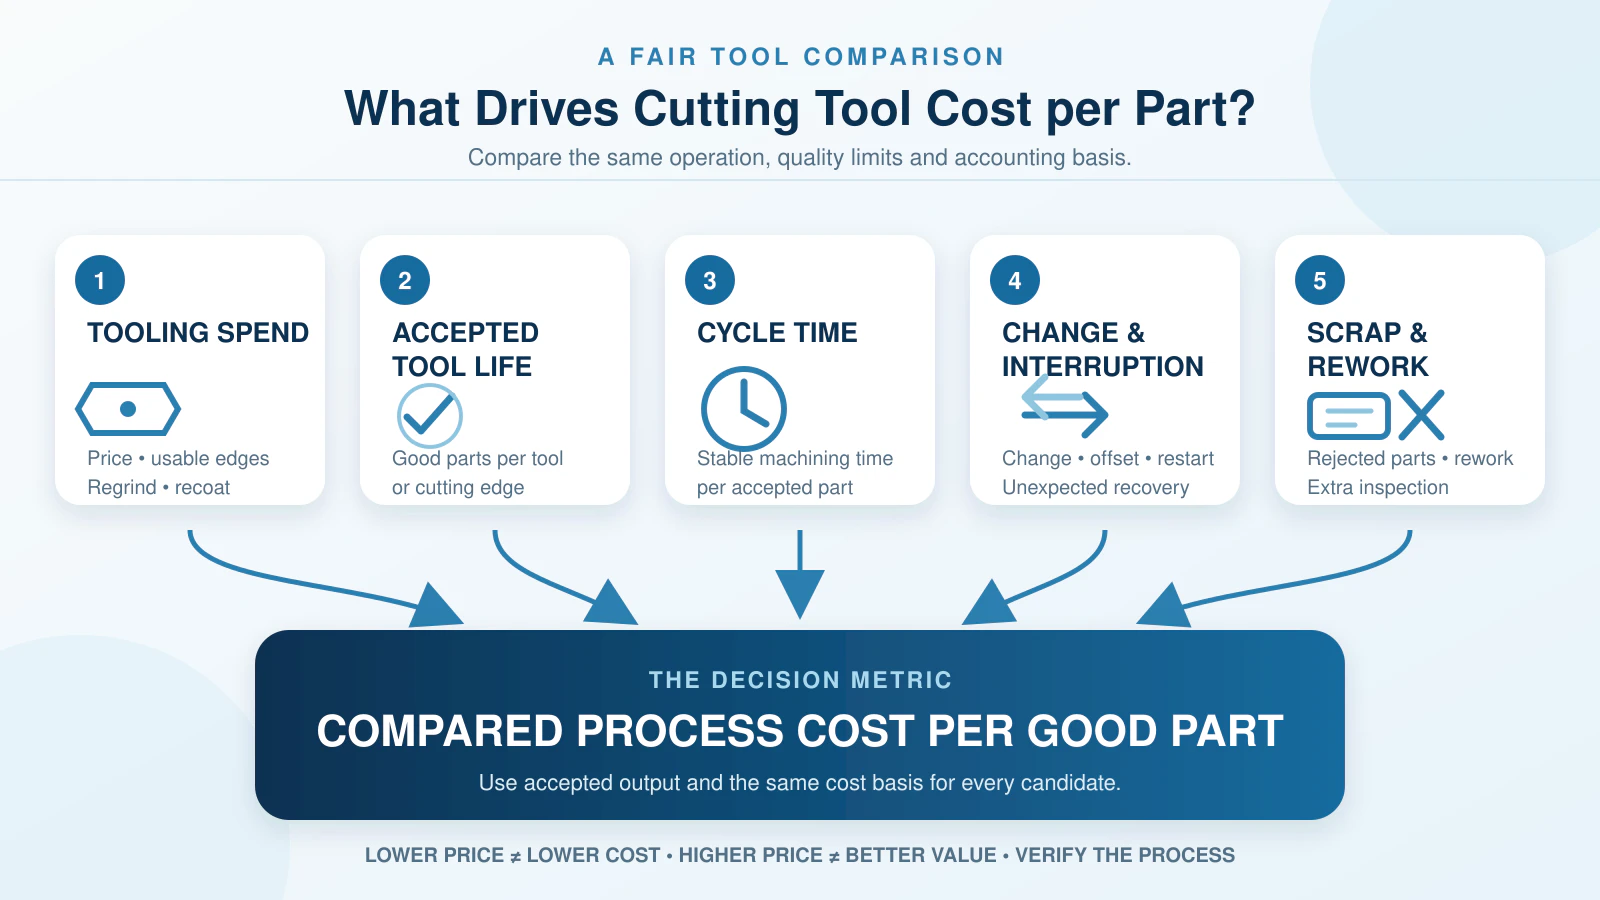
cycle time, interruptions, scrap and rework.
Mistake 1: Comparing Purchase Price Only
A unit-price comparison is necessary but insufficient for process approval. If Candidate A costs less and produces the same accepted output at the same stable cycle, it is the better direct-cost choice. If it requires more changes, slows the cycle or creates more rejects, include those costs.
Price differences may reflect substrate, coating, geometry, tolerance control, scale, brand positioning or commercial terms. The label “cheap tool” does not identify what changed. Compare the specification and result.
For solid carbide applications, first confirm the correct tool family with our solid carbide end mill selection guide, then compare candidates within the same intended operation.
Mistake 2: Using Inconsistent Tool-Life Criteria
“Tool life” can mean minutes in cut, parts per edge, holes per drill, total cutting distance or time until a planned change. Two suppliers can report different values while using different end points.
Define the stop criterion before testing: a wear limit, loss of dimensional capability, finish failure, unacceptable burrs, rising load, chipping or a safety limit. Record the reason for removal and accepted-part count.
Do not run one candidate to failure while changing the other preventively. Use the same rule and distinguish predictable wear from sudden failure. Consistency can be more valuable than a high average with wide variation.
Mistake 3: Ignoring Cycle Time and Throughput
Longer life is not always lower cost if it requires a slower process. A shorter-lived tool may create more output at a reliable, higher material-removal rate. The result depends on machine-hour cost, capacity, demand and change frequency.
Record the stable cutting cycle for each candidate rather than the fastest single part. Include any feed reductions, extra passes or conservative entry moves needed to maintain quality. For milling trials, the carbide end mill speeds and feeds guide explains why starting values must be adjusted for tool diameter, engagement, reach and machine conditions.
There is no universal speed increase that guarantees lower cost. Kennametal also states that its engineering calculations provide theoretical planning values and that actual results can vary. Validate the working window on the real machine.
Mistake 4: Excluding Tool-Change and Interruption Time
A tool change involves more than replacing an item. It can include stopping the machine, indexing an insert, cleaning the pocket, measuring, entering an offset, checking the first component and restoring stable production.
Separate planned change time from unplanned interruption time. A predictable change during scheduled service has a different operational effect from a broken edge that stops an unattended cycle. Use the shop’s actual average time; do not rely on a generic number.
| Event | Time to capture | Possible additional cost |
|---|---|---|
| Planned replacement | Stop, replace or index, measure and restart | Tool-setter or operator time |
| Offset correction | Inspection, adjustment and confirmation cut | Lost capacity and extra inspection |
| Unexpected failure | Alarm, diagnosis, recovery and restart | Workpiece, holder or tool-body damage |
| First-part approval | Measurement and release after a change | Quality-control delay |
Swipe to view all columns.
Mistake 5: Excluding Scrap, Rework and Inspection
A trial that counts every machined component as output can reward an unstable tool. Use accepted parts after normal quality checks. Record dimensional variation, surface finish, burrs, rework, sorting and any additional inspection introduced because the process is uncertain.
Quality cost should be linked to evidence. Do not automatically blame every rejected part on the cutter: fixture movement, runout, coolant, material variation and measurement practice may also be responsible. When a failure appears, use a structured review such as the HY Tools machining troubleshooting guide before assigning the cost.
Mistake 6: Judging the Tool Without Controlling the Cutting System
The cutting edge works as part of a system: tool, holder, spindle, workpiece, fixture, toolpath, coolant and cutting data. A different gauge length, runout level or radial engagement can change the result enough to invalidate a comparison.
Hold the important conditions constant where practical. Check holder condition, clamping, runout, overhang, material batch and heat treatment. Use the same toolpath, engagement and coolant delivery. If one candidate requires different parameters, document the change and evaluate the resulting cost rather than hiding it.
Chatter is a good example: changing only the tool may not solve a rigidity or engagement problem. Our guide to reducing chatter in end milling covers the interaction between toolholding, overhang, engagement and cutting data.
Mistake 7: Approving One Test Without Checking Repeatability
One tool or insert edge can show promise, but rarely proves consistency. Repeat across enough edges, tools or batches to match the purchasing risk and annual volume. High-volume or unattended production needs stronger evidence than a low-volume job.
Buyers should also review supply factors: complete model identification, tolerance and coating consistency, batch traceability when required, lead time, packaging, replacement policy and technical support. These do not replace cutting performance, but they affect whether the result can be repeated after the first order.
HY Tools describes its grinding and inspection approach on the manufacturing and quality page. For any supplier, ask which controls apply to the specific quoted series instead of assuming every product uses the same process.
How to Run a Controlled Cutting Tool Comparison
Begin with a written baseline. The current tool is not automatically the standard of technical perfection, but its production data gives the new candidate a measurable reference.
| Step | Action | Record |
|---|---|---|
| 1. Define | Set the operation and acceptance criteria | Material, feature, tolerance, finish and stop condition |
| 2. Baseline | Measure the current approved process | Tool cost, parameters, cycle, changes, accepted parts and failure mode |
| 3. Control | Keep machine, holder, material, toolpath and coolant consistent | Any unavoidable differences between candidates |
| 4. Trial | Run the candidate within an approved starting window | Wear, load, vibration, dimensions, finish and interruptions |
| 5. Calculate | Use the same cost basis and accepted-output denominator | Direct tool cost and compared process cost per good part |
| 6. Repeat | Confirm performance at a level appropriate to risk | Variation across edges, tools, operators or batches |
| 7. Approve | Document the operating window and purchasing specification | Model, parameters, limits, inspection and reorder information |
Swipe to view all columns.
Change one important variable at a time when diagnosing performance. If geometry, coating, feed, speed and coolant all change together, the trial may show a winner but will provide little guidance when conditions later shift.
Buyer and Cutting Tool Distributor Checklist
A distributor does not need every machining detail before starting a replacement inquiry. A current model code, catalog page, dimensioned drawing or clear tool photos can support an initial comparison. Final equivalence still requires review of the application and, where appropriate, sample approval.
| Inquiry path | Send first | Confirm before approval |
|---|---|---|
| New application | Workpiece, operation, dimensions, machine, holder, coolant and quantity | Acceptance criteria, starting data and trial plan |
| Existing-model replacement | Brand, complete model, catalog page or drawing, photos and quantity | Critical geometry, application, current parameters and sample result |
| Cost-reduction project | Current tool cost, accepted tool life, cycle time and change frequency | Same accounting basis, quality cost and repeatability |
| Distributor tool list | Models, annual or order quantity, target market and packaging need | Specification priority, availability and approval responsibility |
Swipe to view all columns.
Depending on the application, HY Tools can review yekpare karbür parmak frezeler, solid carbide drills and related cutting-tool requirements. A candidate replacement should be described as a candidate until its critical dimensions and production result have been confirmed.
Sıkça Sorulan Sorular
Is the lowest-priced cutting tool always the most economical?
No. It is the most economical only when its tooling, machine-time, interruption and quality costs produce the lowest acceptable result. A lower-priced tool can absolutely win that comparison, but price alone cannot prove it.
Is a premium tool always lower in cost per part?
No. A higher-priced tool may justify its cost through productivity, predictable life or quality, but the benefit must be measured in the actual application. Brand position and purchase price are not substitutes for a controlled trial.
Should tool cost be divided by all parts or only good parts?
Use accepted parts for the main comparison. Also record total pieces started and rejected pieces so the source of the difference remains visible.
How many tools or insert edges should be tested?
There is no universal number. Use enough repetitions to reflect process variation and purchasing risk. High-volume, critical or unattended operations normally require stronger repeatability evidence than a low-volume, non-critical job.
Can HY Tools review a replacement from a model code or photo?
Yes, a complete model code, catalog page, drawing or clear photos can begin an initial review. Application conditions, critical dimensions and a sample test may still be required before final approval.